30 November 2008

Marinated and Cheese Stuffed Mushrooms

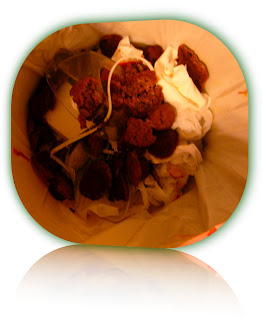
For Thanksgiving Eve I made some marinated and cheese stuffed mushrooms. I almost made either marinated or cheese stuffed mushrooms, but I decided to combine my recipes and see how they turned out. I enjoyed them!


I bought 2 packs of "stuffing mushrooms"... yes, stuffing mushrooms. I have never noticed mushrooms by that name but they clearly served their purpose. On Tuesday night I prepared the marinade... something along the lines of:

1c water
1/2c oil
1/2c red wine vinegar
chopped/minced garlic
spices of choice: oregano, thyme, pepper

Simmer ingredients and then add mushrooms (remember to remove the stalk). Bring to a boil for a few minutes. Allow to cool and store overnight in the refrigerator.

After the mushrooms have been in the marinade overnight, remove and place in a pan or on a cookie sheet. I placed them snugly in a pan so they wouldn't slide around. Stuff with your choice of cheese. I chose brie because it is soft and easy to ball up to fit right inside the mushroom.

Place in oven on a moderate temperature (350-ish) for about 20 minutes.

Optional: garnish with paprika, or use chili powder by accident like I did (hey, they are the same color).

29 November 2008

zucchini au gratin


Zucchini au Gratin

For this meal I've adapted my other gratin potatoes for a lovely green and yellow zucchini/squash dish.  I made it for our pre-thanks meal, and then recreated it a week later when I knew that I'd be able to eat more of it myself.  I'd recommend it whenever you accidentally buy too many zucchini.  (Corgettes-lovers meet zucchini, same difference .... are we all on the same page now?)


ingredients
  • 2 zucchini
  • 1 summer squash
  • 1 cup of milk
  • 2 tablespoons of butter
  • rosemary
  • 3 cloves of garlic
  • a saffron-esque orange seasoning to taste
  • some sharp cheddar cheese
  • 1 tomato
  • a bit of parmesan cheese


So slice the squashes up.  I like the slicer on my cheese grater, but be prepared to guard your knuckles.  I layed the zucchini and summer squash.  To be honest, the second time I made it (like the photo above) I only used one zucchini instead of both, but it was a bad choice because the zucchini shrink a bit as they cook, so the second time around it was a bit less substantial. ....so use both and press them into the casserole dish if you have to.  In the middle of the layers I put in some of the garlic.

When I was done, I mixed up the rest of the garlic with the milk, seasoning and salt/pepper like so:


The seasoning there really is the secret ingredient ... its just that much more satisfying with that yummy orange colour.  Saffron for cheapskates, yo.  Anyway, pour that onto the sliced squash.  It'll all bubble up and be yummy, so don't stress about covering everything perfectly.  Then you want to put the cheese onto the top.  (For the pre-thanks version, I sliced a vine tomato into six slices to garnish and put a good amount of parmesan cheese on top of each slice.)


This is the key bit:  Cover with aluminum foil.  Put in oven at 425 degrees fahrenheit for 20 mins.  Use your timers folks ... when the 20 mins is done, remove the foil.  20 more minutes.  Then cut up the butter and put on the top.  20 more minutes and you're done.

28 November 2008

the gourmet project

We're all very full still, not sure about you, so we wanted to take another day off. But check out another cooking blog we discovered recently: The Gourmet Project. The blog's author Teena is cooking her way through The Gourmet Cookbook, which means that everything you see over there is marked by the page number, which is a nice touch. But more so, it means Teena tries things that she maybe would pass by otherwise ... her write up two posts ago on swiss chard gratin gets this across like so:
Gratin is a word that translates to Deliciousness in my head. So Potatoes au Gratin reads to me as Potatoes au Deliciousness... However, Swiss Chard is a phrase that translates in my head to Bad...when I saw this dish in The Book the title read to me as Bad Deliciousness, and I wasn't sure what to do with it.

27 November 2008

happy thanksgiving

Nothing from us today, but check out Brandy's pecan and sweet potato bread at Moue Magazine!

26 November 2008

almost beautiful except ....


... for the salmon sea. That's kind of creepy. I saw this at the Telegraph. Then googled me some more Carl Warner. He's like the David Lachapelle of food. Although really, your typical food blog photos are more porn-y than these, so perhaps not a completeyl apt comparison. Still, feast your eyes some more:


25 November 2008

Roasted Butternut Squash with Cranberry, Sage & Shallots


So this isn't so much an exact recipe as an improvised riff on something I've had at a local restaurant, but it came out well, is super easy, and definitely worth repeating.

For this recipe, I was pressed for time, and didn't feel like trying to peel and cube a whole butternut squash, but if you feel so inclined, please do. I used 2 packages of pre-peeled and cubed squash, 2 packages of fresh sage, chopped, about 3/4 cup fresh cranberries (cut in half), about a 1/3rd cup dried sweetened cranberries, about 5 shallots (you can use a mild onion, cubed, instead, or some garlic - but I like the milder flavor of shallots) and liberal application of salt and pepper.

Basically, just heat the oven to 425, place all the ingredients in a baking/roasting pan, coat with some EVOO and toss to mix it up, and pop in the oven. I was worried about the fresh cranberries being too tart, but when you bake them they turn into molten berry sweetness. I think I do like the addition of the dried sweetened kind too, though if you wanted you could use just one or the other. The combo of sweet and savory with the sage and the shallots and s&p is lovely, it looks impressive, and goes amazingly well with poultry. I tried this again on Sunday night and roasted a whole chicken in the pan with the squash (stuffed with cranberries, celery, lemon and garlic) and it was AMAZING.

oh yeah, leave the stuff roasting for about 45mins to an hour, depending on your oven, but check it at the 30 min mark and give it a toss with a spatula.

(spatula is the word of the day. use it. love it. )

Workout Queen's Colorful Plate


They say that a colorful plate, in a happy plate. And a happy plate is also a healthy plate. As I'm sure you know by now, I'm all about healthy eating, so check out a colorful, yet delicious meal.

Ingredients:
  • 1/2 Red, 1/4 green, and 1/2 yellow peppers
  • 1/4 cup Olive oil
  • 1/2 cup Crumbled Feta Cheese
  • 1 Boneless chicken breast
  • 1/2 packet of Sazon Goya Seasoning
  • 2 cloves garlic
  • garlic powder
  • other seasonings
Instructions:
  1. Heat olive oil in pan
  2. Slice peppers to desired sizes and add them to the oil
  3. Leave peppers there for 15 - 20 minutes. Flip them several times. Cover the pan to ensure that the peppers are SOFT!
  4. Add garlic gloves to oil while peppers are on heat
  5. Sprinkle peppers with garlic powder and any other seasonings you enjoy
  6. While the peppers are on the heat, add sazon Goya seasoning to chicken on a separate plate
  7. Once peppers have started to soften, add chicken pieces/slices to hot pan. Cover pan
  8. Chicken only requires 7 - 10 minutes cooking.
  9. Once chicken is cooked, and peppers are soft, sprinkle feta cheese on the inside of the peppers.
  10. Place chicken pieces/slices on top of the cheese.
  11. Carefully remove filled peppers from the heat and place on plate. Add a touch more of feta, as garnish. ENJOY!
Sometimes I feel like I eat the same things over and over, and that gets a little boring. But this plate made me really excited because it was a twist on the same foods. It was actually an experiment that I just threw together. I'm a girl of quick meals, and hate lots of preparation, so you'll notice that most of my recipes will require minimal or no preparation, and can be made on the fly. The feta cheese on this dish made the peppers creamy which allowed the different textures to blend together. This meal, as you can see, is full of color and is fun to eat. You can use your hands, and just grab the pepper. I ate it in 5 minutes and feel like I ate plenty. For all you calorie counters out there, just look at the meal. Veggies - CHECK, chicken - CHECK, small amount of cheese - TERRIFIC! If this were on weight watchers, it wouldn't be more than 4 points...so go on girl and EAT IT UP!!

Check out my yummy dessert...coming out next!!

24 November 2008

Fun with Marzipan

With the holiday season upon us, a time for special food creations has arrived. One food that I associate with the holidays is marzipan, an almond and sugar paste. Random, maybe. I think of marzipan around the holidays because my dad - probably the hardest person to buy gifts for - always gets a bar of marzipan from someone in his family. I think it is hilarious.


For much of my life, I thought marzipan was just some weird German treat for which I never inherited a taste... similar to my grandmother's herring salad. At some point in high school, though, I learned that it can be used in a variety of ways for baking and decorating. Allow me to share with you some outrageous marzipan creations I have found:


Cute little pigs. How adorable. Also looks like it might not be too difficult.


A ball of yarn and a little scarf! How clever.


On to intermediate level marzipan creations: A pepper.


Fruit!


I like these monsters... this might be a project for the future.


Expert level marzipan crafting! This artist gets a gold star. Well done.

I hope I have inspired you to make some of your own marzipan creations!

23 November 2008

Amish Cinnamon Friendship Bread

Here's the problem with Amish Friendship Bread: as soon as you make friends with this batter, it tells you what to do for the next 10 days. But like most friendships, all the hassle and mushy stuff turns out great in the end, so it's worth it. Relationships are give and take, people. And you'll be giving out this starter mix to everyone you know.

This is a sweet bread that takes 10 days to rise. Luckily, you won't do much on most of those days. First, you need to get some starter mix, which you must obtain from someone who has recently made the bread. Apparently the Amish are the only ones who know how to make the starter batter, but it's fairly obvious based on the smell and the chemistry happening inside your gallon plastic bag that there's yeast involved. I bet if Alton Brown were on the case he could figure it out...


Important notes:
  • Do not refrigerate.
  • Do not use any type of metal - spoon or bowl.
  • If air gets in the bag, let it out.
  • It is normal for the batter to rise, bubble, and ferment
Directions:
Day 1: Do nothing. (This is the date on your starter bag.)
Day 2: Mush the bag.
Day 3: Mush the bag.
Day 4: Mush the bag.
Day 5: Mush the bag.
Day 6: Mush the bag.
Day 7: Add to the bag - 1 c flour, 1 c sugar, and 1 c milk. Then, of course, mush the bag.
Day 8: Mush the bag.
Day 9: Mush the bag.
Day 10: Actually bake bread!
  1. Pour entire contents of bag into large non-metal bowl.
  2. Add 1 1/2 c flour, 1 1/2 c sugar, and 1 1/2 c milk. mix well.
  3. Label 4 gallon zip-lock bags with 'Day 1' and the date.
  4. Fill each bag with one cup of the mixture.
  5. Preheat oven to 325.
  6. To the remaining batter, add:

  • 3 eggs
  • 1 c sugar
  • 1 1/2 tsp baking powder
  • 1/2 tsp baking soda
  • 2 c flour
  • 1 large box instant vanilla pudding
  • 1 c of oil (or 1/2 c oil and 1/2 c applesauce, for the health conscious)
  • 2 tsp cinnamon
  • 1/2 c milk
  • 1/2 tsp salt
  • 1/2 tsp vanilla

  1. Grease the bottom and sides of two large loaf pans.
  2. Mix 1/2c sugar and 1 1/2 tsp cinnamon in a small bowl. Dust the insides of the pans with half of this mixture.
  3. Pour the batter evenly into the pans and sprinkle with the remaining cinnamon-sugar on top.
  4. Bake for 1 hour. Cool for 10 minutes and remove from pans.


22 November 2008

Workout Queen's Jubilant Jell-o Pudding


I may be a Workout Queen, but I'm also a sucker for sweets. Not like candies, and chocolate bars, but ice creams, and creamy desserts. But, as you know, I'm SUPER low cal. So you can bet your booty I'm making dessert that fits my mouth's and body's needs.
Ingredients:
  • One box of Instant Sugar-free Jell-o Pudding Vanilla
  • 2 cups lowfat milk
  • 1 banana
  • 2 small glasses
Instructions:
  1. Pour the two cups of milk into a bowl.
  2. Add the contents of the jell-o into the bowl and whisk (or use a fork) for 2 minutes.
  3. Once jell-o has slightly thickened, pour a 1/4 of a cup into both glasses.
  4. Take banana and add 5 - 6 slices to the poured jell-o.
  5. Again, pour jell-o on top of the banana slices until almost full.
  6. Add 5 - 6 more slices of banana to jell-o.
  7. Top of the bananas with the remaining jell-0.
  8. Put finished glasses into refrigerator for approximately 5 minutes. ENJOY!
Come on now...wasn't that EASY?? I mean, the simplest dessert I think I've ever made, and it is rich and creamy. The banana slices adds a gently touch of fruit to the dessert, and you'll simply be craving more. Now, the jell-o is 60 calories for an ENTIRE cup, so be careful...or you may be tempted to eat both cups in the same night. Oh and for you weight watchers, this dessert is only 1.5 points, so eat it up!


If you like what you're eating and think my recipes are tasty, let me know by commenting! Show some love to the Workout Queen!

21 November 2008

Whole Wheat Carrot Mini Muffins

So I think that my first mistake is along the lines of "Walk Before You Run"-style truisms. Its hard for me to come up with any baking success stories, both in terms of sweet things or breads. So instead of trying to follow a recipe, I thought I'd get creative. I decided to take a recipe for banana bread muffins and go crazy. Yeah.

The ingredients were straightforward to start with. Flour, baking soda, butter, an egg, sugar. A pinch of salt. I substituted a few cups of grated carrot for the mashed bananas that were called for. I added a bit of peanut butter because I felt like it and some pumpkin seeds for crunch.


After filling most of the mini-muffin pan I realized that I really wanted them to have chocolate chips in there too, so I added those for the remaining 10 or so. Put them in the oven and walk away.

25 minutes later I come back and they're perfect. Just like at the top of the post. But baking hates me.

They were maybe a C+ for the first 5 seconds of chewing (I'd give the ones with chocolate chips a B), and then for the next 5 seconds they became unpleasant while you hurried to swallow, and then your mouth tastes like shoe for 10 more. They were gross. I'm never baking again.

20 November 2008

Workout Queen's Bacon, Egg and Cheese


I'm all about low cal, low fat food, but I still like to grub...so for breakfast, I sometimes dream about eating a bacon, egg and cheese...and STILL can, even when it's low cal.

Ingredients:
  • 3 egg whites
  • Pam olive oil cooking spray
  • one slice of American cheese (or any you prefer)
  • 5 slices of turkey bacon (or however many you'd like)
  • one tortilla, medium size
Directions:

1. spray your pan with Pam until it's just lightly covered
2. break three eggs, leaving only the egg whites in the pan
3. allow the egg whites to cook until they no longer stick to the pan
4. Flip the egg whites to allow them to cook on the opposite side
5. put pieces of cheese on the egg whites as it cooks

6. check the eggs for a cooked consistency, then fold the eggs over to make a half-moon shape
7. add 3 strips turkey bacon to the pan, while egg whites continue to cook
8. as soon as cheese starts dripping out, the eggs should be done.
9. take eggs off the heat
10. add the remaining strips of turkey bacon
11. cook turkey bacon until they are brownish around the edges, or until your liking
12. put egg whites in tortilla, add turkey bacon strips, wrap it up and ENJOY!

I usually have this breakfast on the weekend before I work out. It is easily digestable, and is REALLY low in calories, as well as fat. You can go to the supermarket and check out the nutrition facts on the turkey bacon, but usually it's about 60 calories for 5 slices. After I eat this I feel full and ready to go workout. It has a good balance of nutrients, and there is no guilt for having all that food at once. I even ate a banana before cooking. So, make those gluttens eating REAL bacon, egg and cheese's feel guilty when you're munchin' on the same but saving on all that FAT!! Enjoy!

Old School Peach Cobbler


This is a great recipe for Peach Cobbler if you don't mind taking the time and making one from scratch... which means NO canned peaches and NO store bought crusts. I made this a week ago for Whitnee and she LOVED it (at least that's what she told me)!!!!!

I got the recipe from family.com and I was looking for an original recipe that used fresh peaches and had a great crust as opposed to just drop biscuits over fruit and calling it a cobbler. This is a flaky pastry enclosing peaches flavored with lemon and orange juice and spiced with nutmeg and cinnamon. DELICIOSO!!!

Get out your Rolling Pin! You'll Need:
  • 2 1/2 cups all-purpose flour
  • 3 tablespoons white sugar
  • 1 teaspoon salt
  • 1 cup shortening
  • 1 egg
  • 1/4 cup cold water
  • 3 pounds fresh peaches - peeled, pitted, and sliced
  • 1/2 cup lemon juice
  • 1/2 cup orange juice
  • 1/2 cup butter (1 stick)
  • 2 cups white sugar
  • 1/2 teaspoon ground nutmeg
  • 1 teaspoon ground cinnamon
  • 1 tablespoon cornstarch
  • 1 tablespoon white sugar
  • 1 tablespoon butter, melted

Directions:
In a medium bowl, sift together the flour, 3 tablespoons sugar, and salt. Work in the shortening with a pastry blender until the mixture resembles coarse crumbs. (Whitnee has a food processor that could also be used to mix the dry ingredients with the shortening but I like using the pastry blender.) In a small bowl, whisk together the egg and cold water. Sprinkle over flour mixture, and work with hands to form dough into a ball. It forms a perfect ball of dough. Chill 30 minutes.

Preheat oven to 350 degrees F. Roll out half of dough to 1/8 inch thickness. Place in an ungreased 3 quart 9x13 inch baking dish, covering bottom and the quarters of the way up the sides. Bake for 20 minutes, or until golden brown.

In a large very large saucepan or pot, mix the peaches, lemon juice, and orange juice. There's a lot of peaches so I had to use a wok, it was all we had that was big enough. Add 1/2 cup butter, and cook over medium-low heat until butter is melted. In a mixing bowl, stir together 2 cups sugar, nutmeg, cinnamon, and cornstarch; mix into peach mixture. Remove from heat, and pour into baked crust.

Roll remaining dough to a thickness of 1/4 inch. Cut into half-inch-wide strips. I just drew a knife down the rolled-out dough and it worked great. The recipe says to weave strips into a lattice over peaches, but I don't know how to lattice so I just layed them over the standard way. Sprinkle it with 1 tablespoon sugar, and drizzle with 1 tablespoon melted butter.

Bake in preheated oven for 35 to 40 minutes, or until top crust is golden brown.


MMMMMMMMmmmm, it's start to smell wonderful.


 This goes best with Ice Cream, maybe Cool Whip too, I'm glad it was a success because I've never made peach cobbler and I was dying to make one. My aunt next door to me growing up used to make it all the time and it was amazing. Sometimes you taste dishes growing up that were so good that you decide you'll try to remake that same taste. I may experiment with other versions in the future but for now this one is GREAT!

My baby liked it...so I'm happy.

19 November 2008

Riesling ice cream and wine coolers

Wine Month – Riesling

We tried out Fritz Windisch Selzer Osterberg 2006 Riesling. It’s a very sweet, florid and fruity Riesling with notes of honey, sweeter than many of the others that we’ve had previously. However, we only learned this after drinking it; the purchase was made solely because the label looks the most German.


German wine doesn't get a whole lot of play, so we feel compelled to give a shout out to Gewürztraminer, another sweet white, mostly because it's fun to say (ge-VURTZ-tra-mee-ner).
We're big fans of the Wine Cellar sorbets (thought not the $8+ per pint price tag), so when we found this recipe for Riesling ice cream it seemed like the perfect desert with which to celebrate wine month. Riesling ice cream sounds like it should be difficult, but in actuality only has a few ingredients and the prep goes pretty quickly. We used this recipe from Epicurious but opted out of the anise cookies, because anise is gross.
  • 1 1/2 cups cream
  • 1/2 cup half and half
  • 2/3 cup sugar
  • 4 large egg yolks
  • 1 cup late harvest Riesling wine
Bring 1/2 cup cream and 1/2 cup half and half to simmer in heavy medium saucepan. Whisk sugar and yolks in medium bowl to blend. Whisk in hot cream mixture. Return mixture to saucepan; stir over medium-low heat until custard thickens and leaves path on back of spoon when finger is drawn across, about 4 minutes, do not boil. Strain into bowl. Mix in wine and 1 cup cream. Chill custard until cold.

Process custard in ice cream maker according to manufacturer's instructions. Transfer to covered container (ice cream will be soft) and freeze. (Can be prepared 1 week ahead.)

After trying this, we realized that we should just make our own frozen wine treats and save the money. The ice cream is great - sweet and very creamy, much more so than the Wine Cellar sorbet. It tastes strongly of the Riesling (in a good way) and keeps the fruitiness of the wine, with a buttery aftertaste. A little sprinkle of cinnamon is a nice compliment.


In addition to making a wine ice cream, we tried some cocktails too. If this wine seemed easy to sip on its own, in a mixed drink it became downright gulpable.

The first drink we tried was like juice for adults. It’s called the Hot Springs:
  • 1 ½ oz wine
  • 1/2 oz pineapple juice
  • ¼ oz maraschino liqueur
  • dash orange bitters
Shake and strain into a cocktail glass. We added a maraschino cherry.

This drink was gone in the blink of an eye. The usual cocktail packs a few ounces of high-proof spirits that slows most tipplers down. But the Hot Springs is sweet and simple as a country lass, and just as easy:


The second drink we tried was also easy but not nearly so tasty. We tried making our own White Wine Cooler. Just dissolve ½ tsp of superfine sugar in soda, add wine and ice. This drink could also be called Blasé Blanc. Watered down, sweet, and fizzy, we could bottle this up and sell it to teenagers. Hm, without Zima there is a hole in the market…

18 November 2008

hearty vegetable stew


So I'm calling this a stew instead of a soup based on some of the guidelines I've acquired from wikipedia, but I'm not gonna act like it was an uncomplicated decision:
The distinctions between stew, soup, and casserole are subtle and not always easy to judge. The ingredients of a stew may be cut into larger pieces than a those of a soup and retain more of their individual flavours; a stew may have thicker liquid than a soup, and more liquid than a casserole; a stew is more likely to be eaten as a main course than as a starter, unlike soup; and a stew can be cooked on either the stove top (or range) or in the oven, while casseroles are almost always cooked in the oven, and soups are almost always cooked on the stovetop. There are exceptions; for example, an oyster stew is thin bodied, more like a soup.
But as you can see, a large part is up for debate. Anyways, on to the recipe.

ingredients
  • 6 large potatoes
  • 3 cloves of garlic, finely diced
  • 2 large onions (i used yellow onions)
  • 5 spring onions
  • 2 teaspoons of crushed hot peppers
  • 4 large carrots
  • 1 "bunch" of celery heart
  • 1 cup of orzo pasta
  • 1 can of small white beans
  • 1 liter of hearty vegetable broth
  • 1 liter of water
  • a reasonable handful of frozen spinach
  • seasoning to taste
So like most things I make, start with garlic and onions in oil, but this time in a big ol' pot instead of just a deep sauce pan. I followed with the spring onions, cut less fine than I'd usually encourage, but this stew is going to need all the colour we can put into it. I also added two teaspoons of crushed hot peppers, but if you prefer you could use a diced chili pepper or two. If they're pre-crushed they just get into the oil that much quicker. Give it a minute to do its thing, while that's happening peel the potatoes and carrots and cut them into hearty chunks. The celery should get chopped into decent-sized pieces as well. By the time you've finished cutting them all it'll be time to throw them in the pot.
For both additional protein and starch, I added about a cup of orzo and a can of small white beans. They got tossed into the mix, then add the water. Turn heat to high until the water boils, then drop the heat back to medium and add the vegetable broth. Add the frozen spinach, its mostly for the color.
Once you're at this point, its all about seasoning and playing the waiting game. I went with rosemary, black pepper, kosher salt and chives. JaBootaay made some chicken to go with his and our roomie, I had a big bowl of just the stew. Next time, I need to make sure I have quinoa on hand, since that adds a good texture and lot of healthy goodness. You'll notice that despite all the lovely green things I put it everything was beige by the end except for the carrots. This made me sad. I probably should have put in some fresh parsley at the end to remedy that.

17 November 2008

Mini Bacon & Egg Pastries with Cheddar


I like this recipe alot, I made it last Sunday morning for breakfast. I got it from Whitnee's cookbook called 'Brunch,' and I wanted to make it seeing how she is obsessed with brunch. Unfortunately I would never have the time to make all the dishes I'd like to in order to have a proper brunch, but this is a great start. These pastries are very tasty and filling, they have also have a nice flaky crust. They're pretty easy, so don't get discouraged because it's a bit of a small process, quick however.


This recipe makes 12 Pastries. You'll need a muffin pan and...
  • 1 box Pillsbury prepared pie dough (much easier than making crust from scratch for a simple dish)
  • All-purpose flour (for rolling)
  • 2 tbsp whole-grain mustard (I bought Grey Poupon and it was great)
  • 12 slices of lean bacon, cooked and diced (I used Turkey bacon, MMmmm)
  • 12 small eggs
  • Pepper
  • 1 Cup of Cheddar Cheese
  • 2 tbsp parsley
Preheal the oven to 350F. Lightly grease a standard 12 cup muffin pan.


I used a single Pillsbury pie crust to roll out 10 pastries, if you don't want to waste 2 of them that are in the package.

Unroll the Pillsbury dough and roll the dough thinner to about 1/4-inch thickness on a lightly floured counter and cut 12 circles approximately 5 inches in diameter. I had to find the perfect small bowl that was 5 inches wide. Use dough cutouts to line the cups of the muffin pan, gently pleating the sides of the dough as you ease it into the molds.


Place 1/2 teaspoon of the mustard into the base of each pastry shell and top with a little of the bacon.

Break an egg into a cup, spoon the yolk into the pastry shell, then add enough of the egg white to fill the pastry shell about two-thirds full. Do not overfill. Season to taste with salt and pepper and sprinkle the grated cheese evenly over the tops of the pastries.


Bake for 20-25 minutes, or until the egg is set and the cheese is golden brown. Serve topped with parsley flakes.


MMMMmmm... Nom Nom.

They smell wonderful. You will surely enjoy these...

Peace.

LinkWithin

LinkWithin Related Stories Widget for Blogs